Hola Fronters 👋
¿Tienes un servidor ProxmoxVE en tu red local y necesitas acceder a él desde la calle? Tal vez estás de viaje, trabajando remoto o simplemente quieres revisar tus máquinas virtuales sin estar en casa. Exponer el panel de administración directamente al internet no es la mejor idea por seguridad.
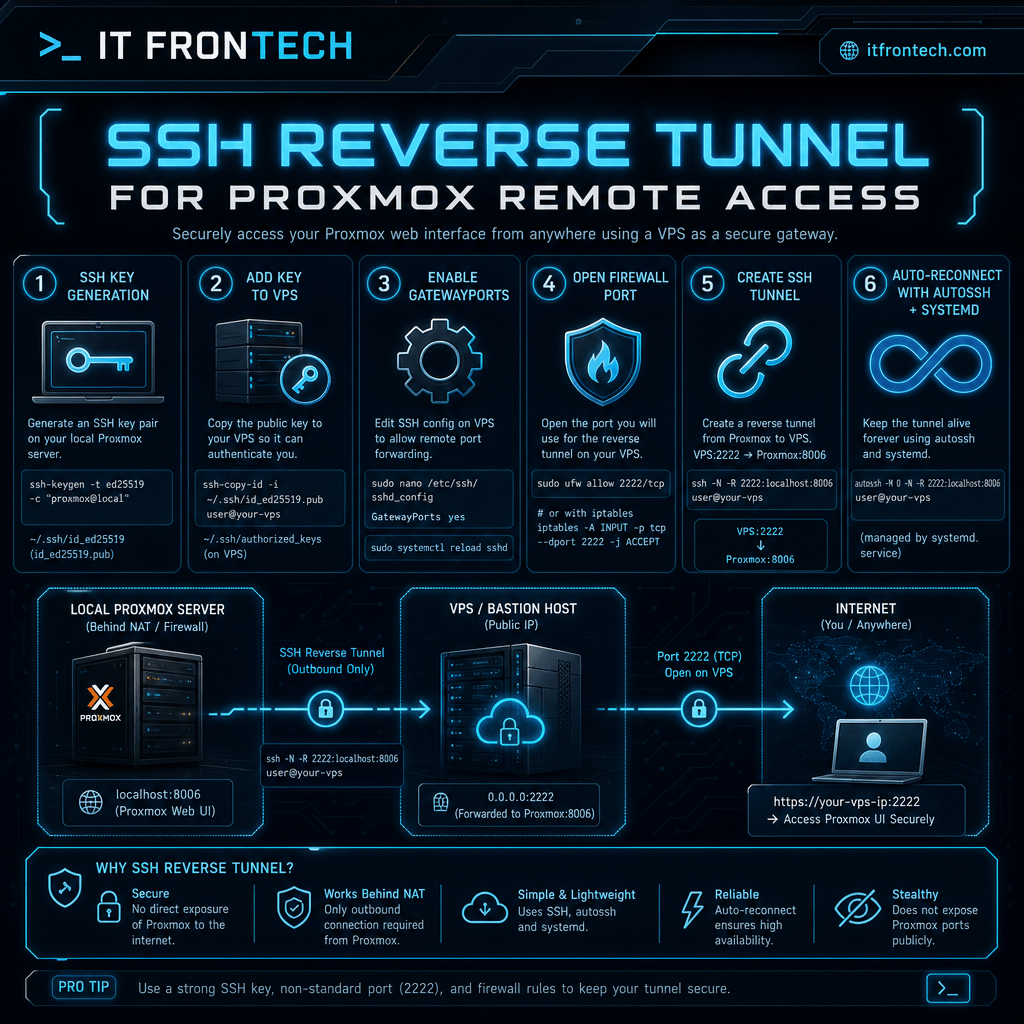
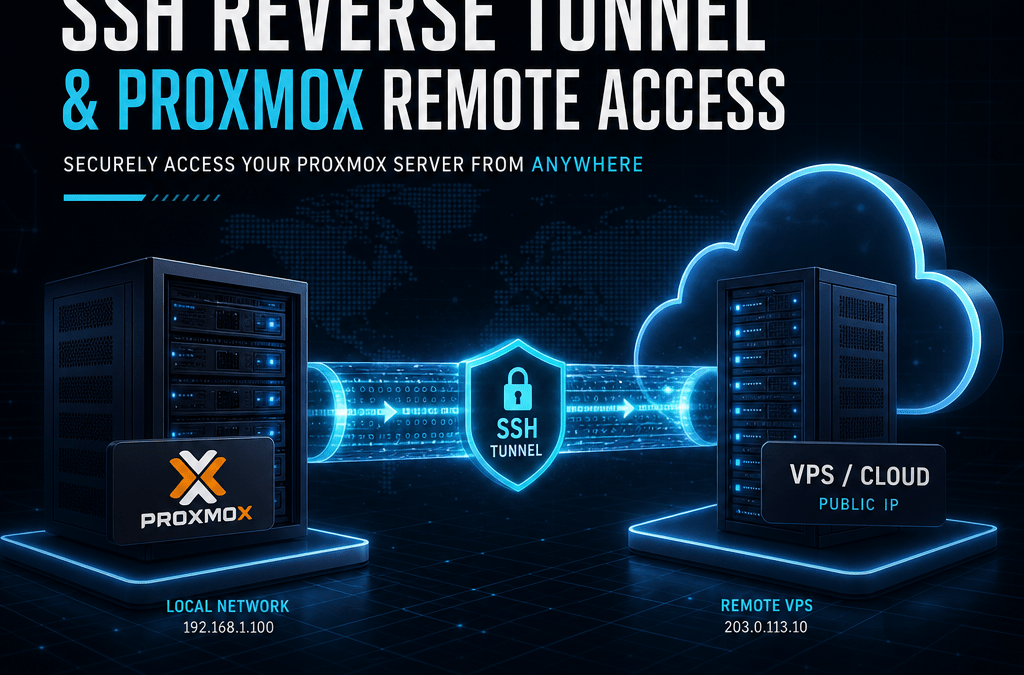
La solución es un SSH Reverse Tunnel: un túnel cifrado desde tu Proxmox hacia un VPS que actúa como puente. Así accedes desde cualquier lugar sin abrir puertos en tu router ni exponer servicios al público. En este tutorial te explico paso a paso cómo configurarlo.
Escenario
- ProxmoxVE en tu LAN:
TU_IP_PROXMOX_LAN - VPS:
IP_DEL_VPS - IP pública de tu casa:
TU_IP_PUBLICA(no la necesitamos) - Objetivo: Acceder al panel de Proxmox (
https://TU_IP_PROXMOX_LAN:8006) desde cualquier lugar
1. Generar Clave SSH en Proxmox
Ejecuta esto en tu máquina con Proxmox (como root o con sudo):
ssh-keygen -t ed25519Presiona Enter para todas las preguntas (ruta por defecto, sin passphrase si quieres que arranque automático después).
La clave pública se guarda en: ~/.ssh/id_ed25519.pub
Muéstrala con:
cat ~/.ssh/id_ed25519.pubOutput ejemplo:
ssh-ed25519 AAAAC3NzaC1lZDI1NTE5AAAAIAoWK8pA+Dzru4rrK08dTITccSZpqgIHvDre1gKVeXQ2 root@pve
Esa línea se la pasas a quien administre el VPS para que la agregue al ~/.ssh/authorized_keys.
2. Agregar la Clave Pública al VPS
En el VPS (IP_DEL_VPS), como tu usuario:
echo "ssh-ed25519 AAAAC3NzaC1lZDI1NTE5AAAAIAoWK8pA+Dzru4rrK08dTITccSZpqgIHvDre1gKVeXQ2 root@pve" >> ~/.ssh/authorized_keysSi el directorio ~/.ssh no existe, créalo primero:
mkdir -p ~/.ssh && chmod 700 ~/.sshAhora desde el Proxmox ya puedes probar conexión SSH simple:
ssh USUARIO@IP_DEL_VPSDebería entrar sin pedir contraseña.
3. Configurar el Servidor SSH del VPS (GatewayPorts)
Por defecto, los puertos de un reverse tunnel SSH solo escuchan en localhost. Para que escuchen en la IP pública, hay que habilitar GatewayPorts en el VPS.
En el VPS, edita /etc/ssh/sshd_config como root:
sudo nano /etc/ssh/sshd_configBusca las líneas:
#GatewayPorts no
#AllowTcpForwarding yes
Cámbialas a:
GatewayPorts yes
AllowTcpForwarding yes
Guarda y reinicia el servicio SSH:
sudo systemctl restart ssh🔍 Verificación: Después de reiniciar, confirma que quedó:
grep -i "GatewayPorts" /etc/ssh/sshd_config
# Debe mostrar: GatewayPorts yes
4. Abrir el Puerto en el Firewall del VPS
Si el VPS usa UFW (como en este caso), solo el puerto 22 está abierto por defecto.
Abre el puerto que vas a usar para el túnel:
sudo ufw allow 8006/tcp
sudo ufw reload
🔍 Verificación:
sudo ufw statusDebe mostrar
8006/tcp ALLOW Anywhere
5. Crear el Túnel SSH Reverso (Modo Manual)
En tu Proxmox, ejecuta:
ssh -R 0.0.0.0:8006:TU_IP_PROXMOX_LAN:8006 -N USUARIO@IP_DEL_VPSFlags:
-R 0.0.0.0:8006:TU_IP_PROXMOX_LAN:8006— Reverse tunnel: el VPS escucha en puerto 8006 (todas las interfaces) y reenvía aTU_IP_PROXMOX_LAN:8006-N— No ejecuta comandos, solo mantiene el túnelUSUARIO@IP_DEL_VPS— Usuario e IP del VPS
Mientras esta terminal esté abierta, desde cualquier lugar puedes acceder a:
http://IP_DEL_VPS:8006Para cerrarlo, presiona Ctrl + C.
6. Hacerlo Permanente con autossh + systemd
Para que el túnel arranque solo cuando el Proxmox se reinicie y se reconecte automáticamente si se cae.
6.1 Instalar autossh
En tu Proxmox:
apt update && apt install -y autossh6.2 Crear el servicio systemd
Crea el archivo de servicio:
sudo nano /etc/systemd/system/proxmox-tunnel.serviceContenido:
[Unit]
Description=SSH Reverse Tunnel to VPS for Proxmox
After=network-online.target
Wants=network-online.target

[Service]
Type=simple
User=root
Environment=AUTOSSH_GATETIME=0
ExecStart=/usr/bin/autossh -M 0 \
  -o "ServerAliveInterval=30" \
  -o "ServerAliveCountMax=3" \
  -o "ExitOnForwardFailure=yes" \
  -o "StrictHostKeyChecking=accept-new" \
  -R 0.0.0.0:8006:TU_IP_PROXMOX_LAN:8006 \
  -N USUARIO@IP_DEL_VPS
Restart=always
RestartSec=10

[Install]
WantedBy=multi-user.target
6.3 Habilitar e iniciar el servicio
sudo systemctl daemon-reload
sudo systemctl enable proxmox-tunnel.service
sudo systemctl start proxmox-tunnel.service
6.4 Verificar que funciona
sudo systemctl status proxmox-tunnel.serviceDeberías ver algo como:
● proxmox-tunnel.service - SSH Reverse Tunnel to VPS for Proxmox
     Active: active (running)
Y en el VPS, verifica que el puerto está escuchando:
ss -tlnp | grep 8006Debe mostrar:
LISTEN 0 128 0.0.0.0:8006 0.0.0.0:*7. Probar el Acceso Remoto
Desde cualquier dispositivo fuera de tu red local (celular con datos, laptop en un café, etc.):
http://IP_DEL_VPS:8006Te va a aparecer la pantalla de login de Proxmox. Usas tu usuario y contraseña local de Proxmox.
Resumen de Comandos Rápidos
| Acción | Comando | ¿Dónde? |
|---|---|---|
| Generar clave SSH | ssh-keygen -t ed25519 |
Proxmox |
| Túnel manual | ssh -R 0.0.0.0:8006:TU_IP_PROXMOX_LAN:8006 -N USUARIO@IP_DEL_VPS |
Proxmox |
| Ver estado del túnel | sudo systemctl status proxmox-tunnel.service |
Proxmox |
| Ver puerto en VPS | ss -tlnp | grep 8006 |
VPS |
| Abrir puerto en firewall | sudo ufw allow 8006/tcp |
VPS |
Notas de Seguridad
- El túnel solo expone el puerto 8006 de Proxmox — no toda tu red.
- Para mayor seguridad, combínalo con WireGuard o al menos usa un puerto no estándar (ej:
-R 0.0.0.0:24456:TU_IP_PROXMOX_LAN:8006). - Si quieres solo para ti, limita el acceso por IP en UFW del VPS:
sudo ufw allow from TU_IP_PUBLICA to any port 8006- Proxmox ya tiene su propio login, pero asegúrate de tener contraseña fuerte.
Conclusión
Con este túnel SSH reverso tienes acceso a tu Proxmox desde cualquier lugar del mundo, de forma segura y sin exposición directa al internet. La combinación de autossh + systemd lo hace automático y tolerante a fallos de conexión.
¿Te sirvió este tutorial? Déjame saber en los comentarios y compártelo con otros Fronters que también administren servidores 🚀
📊 Infografía: SSH Reverse Tunnel